


How To Sew A Removable Pillow Cover | Easy!
- Hailey

- Sep 1, 2020
- 3 min read
Hi, everyone! Who wasn't shocked by the high price-point of throw pillows and pillow covers when they began decorating their first home?
Fret no longer! Here's an incredibly simple tutorial on how to make your own throw pillow covers. Best part? They're removable! So, they're easy to change out and wash.

Watch the video tutorial here. And if you want to know how to make your own throw pillow inserts, here's a blog post and here's an IGTV tutorial!
Things you'll need:
Fabric of your choice
Scissors
Fabric pen
Iron
Measuring tape
Sewing machine
Step 1.

Figure out what size you want your pillow cover to be. I went with 18"x18", but make yours any size you want.
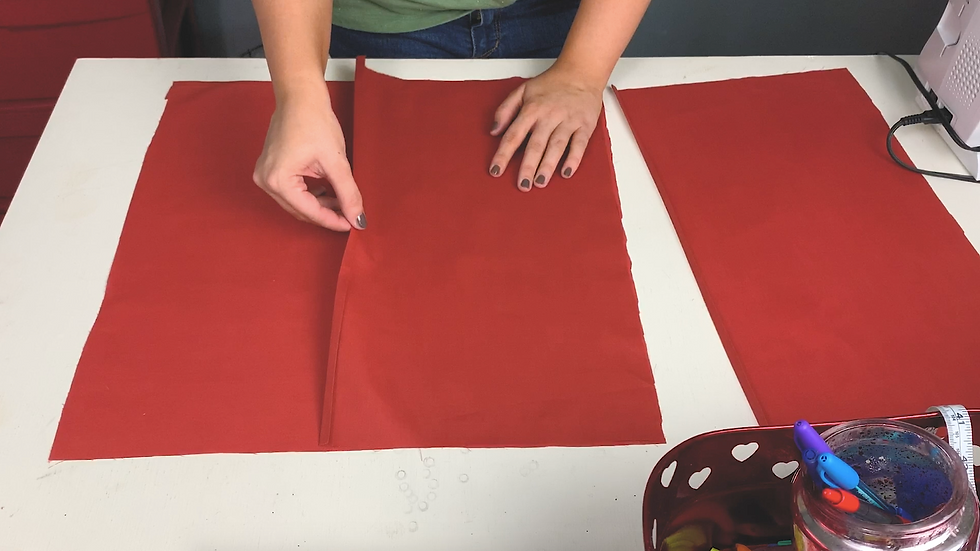
Since we're making a pocket at the back of the pillow, each pillow cover is constructed by 3 separate pieces of fabric. Piece 1 will be the front and pieces 2 and 3 will be the back.
Piece 1 will be cut to the size you want the overall pillow to be (add in a seam allowance if you want.) For me, piece one is 18"x18".
To figure out the back pieces, here's a little formula. The height of each back piece will match the height of the front piece. In my case, 18". To find the width of the back pieces, divide the width of the front piece by 2, then add 2".
Example: 18" / 2 = 9" + 2" = 11"
The cut list for my pillow is: 1 piece that's 18"x18", 2 pieces that are 11"x18".
If that's confusing, think of it like this. We want to split the back of the pillow in half so we create a pocket that will allow us to insert and remove our pillow form. We want to add 2" to each back piece so that they overlap a bit, so the pillow insert isn't visible. The additional 2" on each piece also gives us enough extra fabric that we can double hem the pocket so that it looks a little more professional.
Step 2.

After you get your fabric cut, it's time to press. Start by pressing the front piece to remove any wrinkles. After you press the wrinkles out of each back piece, it's time to press the edge we're going to double hem. You'll just need to press one long edge of each back piece. If your fabric has a right and wrong side, make sure you're pressing toward the wrong side of each piece. Start by folding over the long edge .25", then press. Fold over another .25" and press again.
Step 3.
After you've pressed the double hem of each back piece, it's time to stitch them down. Sew a straight stitch down the edge of each hem.
Step 4.
Now it's time to sew our pillow together. Lay the front piece of fabric down with right side up. Lay 1 back piece down on the left side of the front piece. Lay the back piece front side down, with the raw long edge of the back piece lined up with the raw edge of the front piece, so that our hemmed edge of the back piece is towards the middle of the front piece.
Stitch around the top, side, and bottom of the back piece. I recommend sewing and back-stitching a few times where the hemmed edge of the back piece attaches to the front piece. This will prevent those stitches from snapping when it comes time to add (shove) in your pillow insert.
Step 5.

After you've attached the left back piece, do the same thing with the right. Lay it right side down on the front piece. Line up the raw long edge of the back piece with the raw edge of the front piece, with the hemmed edge toward the middle. This piece will overlap the other back piece. Stitch around the top, side, and bottom of the back piece, stitching and back-stitching a few times where the hemmed edge of the back piece meets the front piece.
Step 6.

Use the pocket at the back of the pillow to turn your pillow cover right side out. Be sure to poke out your corners.
And that's it! So easy!

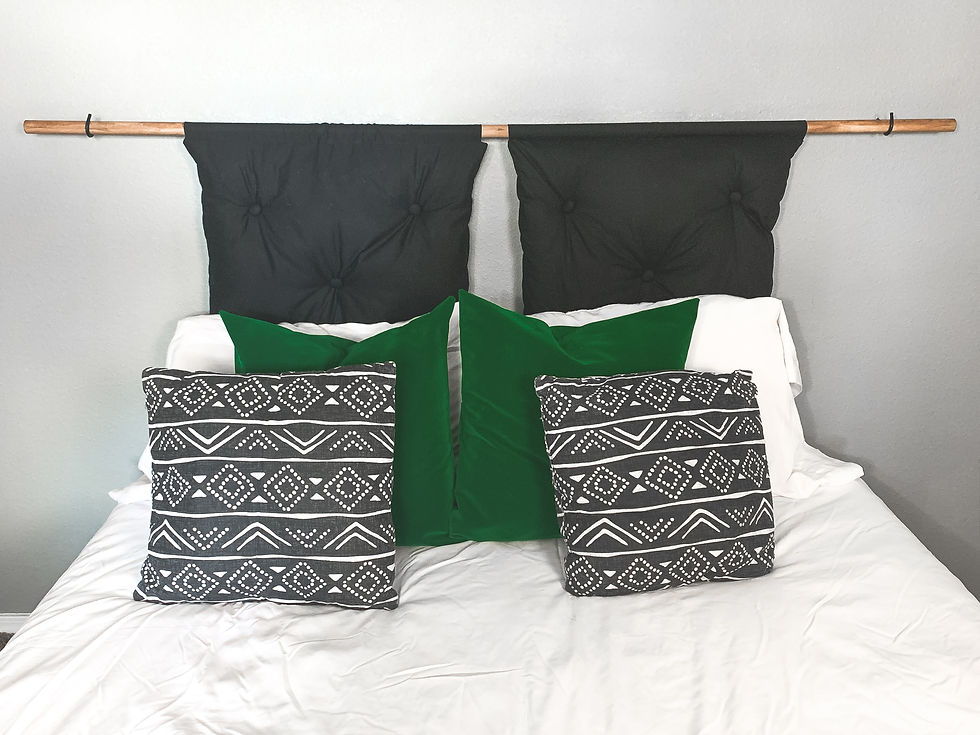
Will you go throw pillow crazy now that you know how to make your own covers? I did 😬 At one point I had like 15 pillows on my 2 couches. Moving on!
I really hope you found this tutorial helpful! If you decide to try it out for yourself, tag me on Instagram @hailsbellsblog so I can see your creation!
Thanks for reading, friends, and happy sewing!
Hailey


Comments