


DIY Pillow Headboard
- Hailey

- Aug 8, 2020
- 4 min read
Raise your hand if you’ve been using the side rail of your baby’s crib as a headboard for the past 5 months 🙋♀️
Moving along…
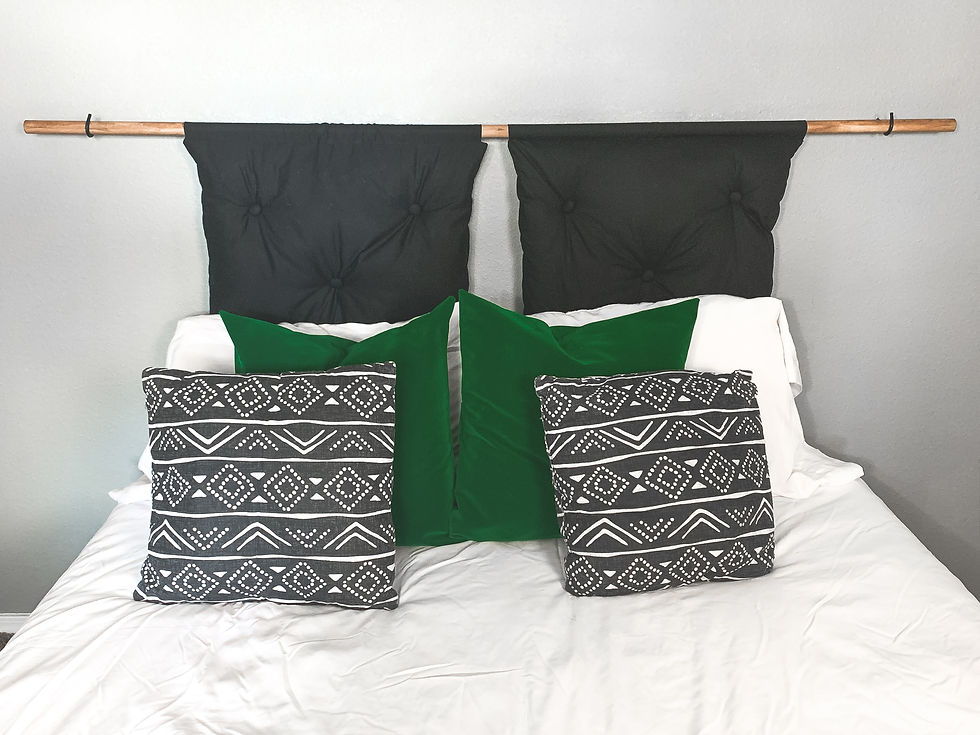
It feels goooood to finally be getting my house decorated. I’m doing a full bedroom makeover and this pillow headboard was one of the first stops on my long, long list. Let me tell you how to make it, or watch the video here.
Things you’ll need:
-Fabric for your cushions (I used black cotton fabric)
-Covered buttons (Here is a video that shows how to DIY them)
-A rod to hang your cushions from (I used this wooden dowel)
-Hooks to hang your rod on the wall (I used these)
-Poly-fil (This is also a good opportunity to upcycle or recover cushions or pillows you already own!)
Step 1
To make your cushions, start by determining how large you want them to be. For reference, I have a queen size bed and I made my cushions 24”x24”, and I think they fit the bed really well. This project allows for total customization, so you can make your cushions any color, pattern, size, and shape you want. I went with black squares like the trend-setter I am.
After you get the front and back of your cushions cut out and ironed, decide how you want your cushions to attach to the rod. I made a rod pocket that extends the length of the top of the cushion and is open at both ends so the rod can slide right through (like curtains). The wooden dowel I used is 1” in diameter, so I cut the strip of fabric for my rod pocket 4”x24”.

Start by pressing the short ends of your strip of fabric toward the wrong side. The amount you fold in will be equal to the seam allowance you’re using on your cushions. I cut my cushions 24”x24” and used a .25” seam allowance, so I cut my strip 24” wide and folded each end in .25”. Stitch the ends down so you have a finished edge on the right side of the fabric.
Step 2
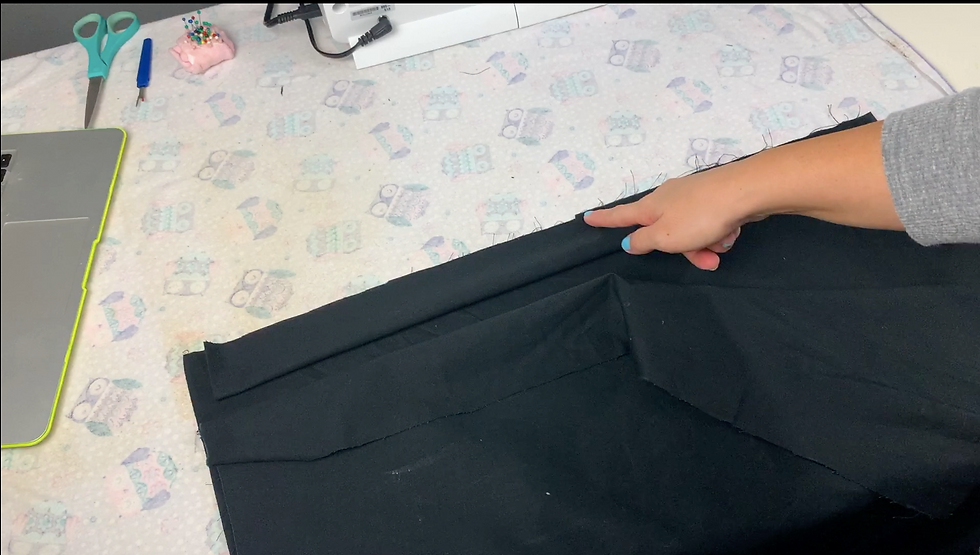
Now it’s time to assemble our fabric so we can stitch the cushion together. Start by placing right sides of your cushion fabric together. At the top edge of your fabric, sandwich the strip for the rod pocket in between the front and back cushion fabric. Fold the strip in half with the right side of the fabric on the outside and place the open edge of the folded strip at the top of the cushion fabric. Raw edges will be aligned. Position the folded strip equal distance from each edge of the cushion fabric. The ends of your strip should have been folded in enough that when you stitch around the edge of your cushion, you won’t stitch the rod pocket closed. Stitch all 3 pieces of fabric together and then continue the stitch around the entire cushion. Leave a 6” opening at the bottom of the cushion.
Step 3
Using the pocket at the bottom of the cushion, flip the fabric right side out. Make sure you poke your corners out. Now it’s time to stuff your cushion. I made mine 3-4” thick, but this is totally up to you.

Once you’re done, press the edges of the pocket towards the inside and stitch it shut.
Step 4
Now it’s time to add your covered buttons. If you want to make your own like I did, here’s a super easy tutorial to follow. Of course, you can also buy them already made. I did 5 buttons. I started by finding the center of my cushion and adding a pin. I made each corner button 5.25” from the edges and marked each place with a pin.
To do this properly, you need a button for the front of the cushion and one for the back. Follow this simple tutorial on how to attach the buttons. I didn’t have enough buttons to do one on each side, so I did a button on the front and used a pea-sized wooden craft bead on the back to act as my second anchor point. I show how I did this in my video tutorial here.
Step 5
Now it’s time to put your cushions on your rod. I used a 1”x72” wooden dowel from Home Depot and stained it with Special Walnut by Varathane. It fit through the rod pocket on my cushions like a glove.
Step 6

To hang my headboard on the all I used hooks. I was hesitant on this at first because in order for the hooks to be able to hold my 1” dowel, they needed to be pretty big and it was scary putting holes that large in my wall. But we made sure to measure and measure again, went for it, and they ended up being placed perfectly. After spray painting them black, I really like the look of the hooks, too!

And that’s it! How do you feel about the pillow headboard? Is it something you’d have in your home? I must say, not only do I love the aesthetic, but it’s quite comfy as well. I use my laptop in bed a lot and it’s so nice to be able to lean back on cushions instead of a hard headboard.
If you try this project out, I’d love to see what you do with it! Share your pics with me on Instagram @hailsbellsblog. If you have any tips on how to make this headboard better, leave them in the comments of this post so we can all hear your ideas!
Thanks for reading and happy crafting, friends!
Hailey


Comments